
Here, we will explain the procedure for making handmade badges using "Kurumi-buttons" available at Daiso and other 100 yen stores. You can make your own illustrations, images of your guesses, or photos of your memories into badges at a low cost.
Easy-to-make canned batches
Source: handmade.xsrv.jp
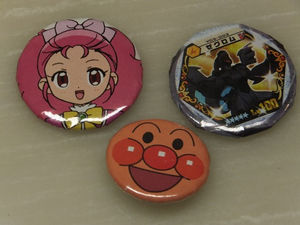
My own original canned bread!
Don't you want to use your own illustrations and photos to create an original can batch?
If you use "walnut button kit" at 100 yen shop, you can make it easily.
Let's make a badge with walnut buttons (basic version)
Source: otonanozugakousaku.net
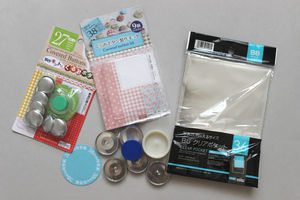
Materials
I think it is quite difficult to make it in a size smaller than 27 mm.
Please prepare something as big as possible.
The clear pocket can be used in other sizes as long as the paper pattern can be cut out.
This is an easy way to process illustrations and photos into badges. The cost of materials is also low, making it very economical.
Kurumi-button kit from Daiso (27mm/38mm)
Clear pocket
Safety pins (length: 32mm/38mm)
Manuscripts (illustrations/photos) to put inside
(Thick paper and photos tend to wrinkle easily, so it is safer to make color copies.
How to make
Source: otonanozugakousaku.net
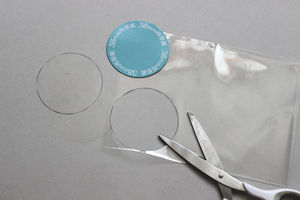
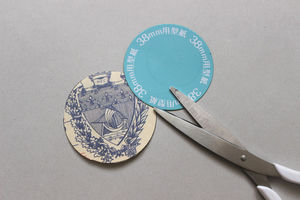
1. Cut a clear pocket (material: pp) as per the pattern.
Source: otonanozugakousaku.net
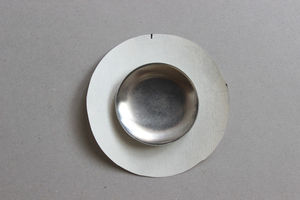
2. Cut your favorite paper to fit the mold.
Source: otonanozugakousaku.net
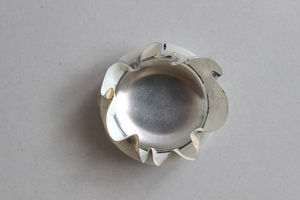
3. Attach the parts to the center of the paper.
Source: otonanozugakousaku.net
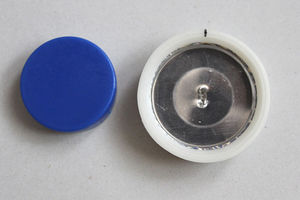
4. Push the silicon mold into the silicon mold.
Source: otonanozugakousaku.net
5. Push in the back parts with a special tool.
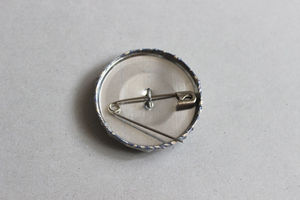
Source: otonanozugakousaku.net
6. Attach a safety pin to the back and you are done!
1. Cut the clear pocket (material: pp) as per the pattern. Since it is a bag, it is efficient to cut two pieces at once. The pattern is attached to the base paper enclosed in the Kurumibotan kit.
2. Cut your favorite paper to fit the pattern. Thinner paper is recommended.
Attach the parts to the center of the paper.
Stick the double-sided tape in the middle of the part...
Attach the part to the center of the paper.
It is difficult to put the picture in the center of the paper,
But this way, you can control it a little bit.
4. Push the silicone mold firmly into the silicone mold.
Place the PP film and paper on top of the base paper, in that order, and press the film into the silicon mold.
Fold the excess part inward.
5. Press the back part into the silicon mold with a special tool.
The key is to make the loop on the back vertical.
Pass a safety pin through here.
If the loop is horizontal, it will tilt 90 degrees when the badge is attached.
6. Attach the safety pin to the back of the badge and you are done!
Remove the badge from the silicon mold, attach the safety pin to the back, and you are done!
Easy Child Craft "Walnut Button Can Badge"
otonanozugakousaku.net
The biggest weakness in making badges this way
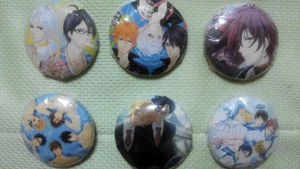
Source: prcm.jp
Wrinkles in paper and film are noticeable.
When made in this way, wrinkles in the paper and film are noticeable. Although the quality is fine for personal enjoyment, it is a bit bothersome.
Let's make a can batch with a walnut button (improved version)
If it wrinkles, hide it with masking tape!
The surface is also coated with topcoat, so the PP (clear bag) wrinkles will disappear.
フォロワー様に手作りバッチのメイキングを頼まれたのでやってみました!100均に売ってるもので簡単に出来るので是非! pic.twitter.com/nq5ss4uLFV
— 怜たそ… (@marimowwwww) 2013.09.03 21:43
Making Can Batches with Walnut Buttons
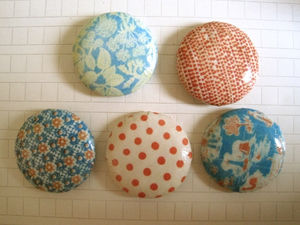
Source: atelier.woman.excite.co.jp
The definitive version of can badges made with paper and walnut buttons! You can make them beautifully with few wrinkles. All you need are things you can find at 100 yen stores!
I think this is the most beautiful badge made with paper.
What to prepare
Walnut button kit from 100-yen shop
Water-based varnish from a 100-yen store
Bond
Printed materials on copy paper
Safety pins
way of making

Contents
- Easy-to-make canned batches
- Let's make a badge with walnut buttons (basic version)
- How to make
- The biggest weakness in making badges this way
- Let's make a can batch with a walnut button (improved version)
- Making Can Batches with Walnut Buttons
- way of making
- Wrinkles even in improved and definitive versions.
- Creating badges using fabric prints
- Try making it with materials other than cloth
- Use stretchy labels.
- Use a water transfer sheet that allows the base of the badge to be utilized.
- Resin can be used to make even more wonderful badges.
- Decoupage is also recommended.
- Here, I came up with a way to fasten the safety pin.
- fasten with string
- fasten with tape
- Fasten with thin wire
- Fasten brooch pin
- Using safety pin parts
- Make it easier! Make it more beautiful! In that case, it is definitely a special kit.
- Hamepachi round badge
- Walnut Button Brooch Set
- How to arrange badges
- strap (often decorative for key-holder, mobile phones, etc.)
- magnet
- rosette
- For hair elastic decorations
- To record children's growth
- Specialized machine for badges
- Professional badge machine
- Can batch GOOD!
- Summary
- Related Links